This blog will help you improve your kettlebell swing, pain and mobility. You will learn our simple 3 step self mobility assessment as well as our 8 step process to a great kettlebell swing. Check it out below!
The kettlebell swing is an excellent exercise to develop lower body strength, power, speed, coordination and general athleticism. Unfortunately, many personal trainers, coaches and practitioners fail to understand and implement appropriate cueing, progressions and regressions. In conjunction to this, they also fail to understand how the kettlebell fits into a performance or general well being exercise program.
The swing is an exercise that is classified as a ‘hip dominant’ power exercise and will develop the posterior chain (hamstrings, glutes and back) and as such it will load these tissues. Interestingly, the current research suggests that technique on its own is not necessarily a risk factor, rather, injury may occur when the load applied to the back exceeds what the tissues are prepared for. For example, some people may perform a kettlebell swing with ‘poor form’ however do not injure their back. This may be because their body has learnt to adapt and cope with that technique over a long period of time. While I certainly am not advocating for poor form or that coaching is not important, the point is that injuries are more likely to come from ‘too much to soon’. Good technique allows our body to be more efficient in force transfer through the system. Our muscles, ligaments, joints and bones take time to adapt and often it is the lack of respecting this timeframe that causes pain and injury.
A common fault of the kettlebell swing that can cause back pain is not having the correct amount of hip mobility to keep the spine neutral. If we don’t have enough movement in the hips we cause a compensatory motion at the lower back. This ‘overuse’ of the lower back can cause pain and possible injury.
So, how can you improve your back pain during the kettlebell swing?
If you are looking to perform the kettlebell swing without back pain, keep reading below
Step 1: Test your mobility via our simple self mobility assessment (found below).
Step 2: Follow our mini video series to improve the quality of your swing (Found below)
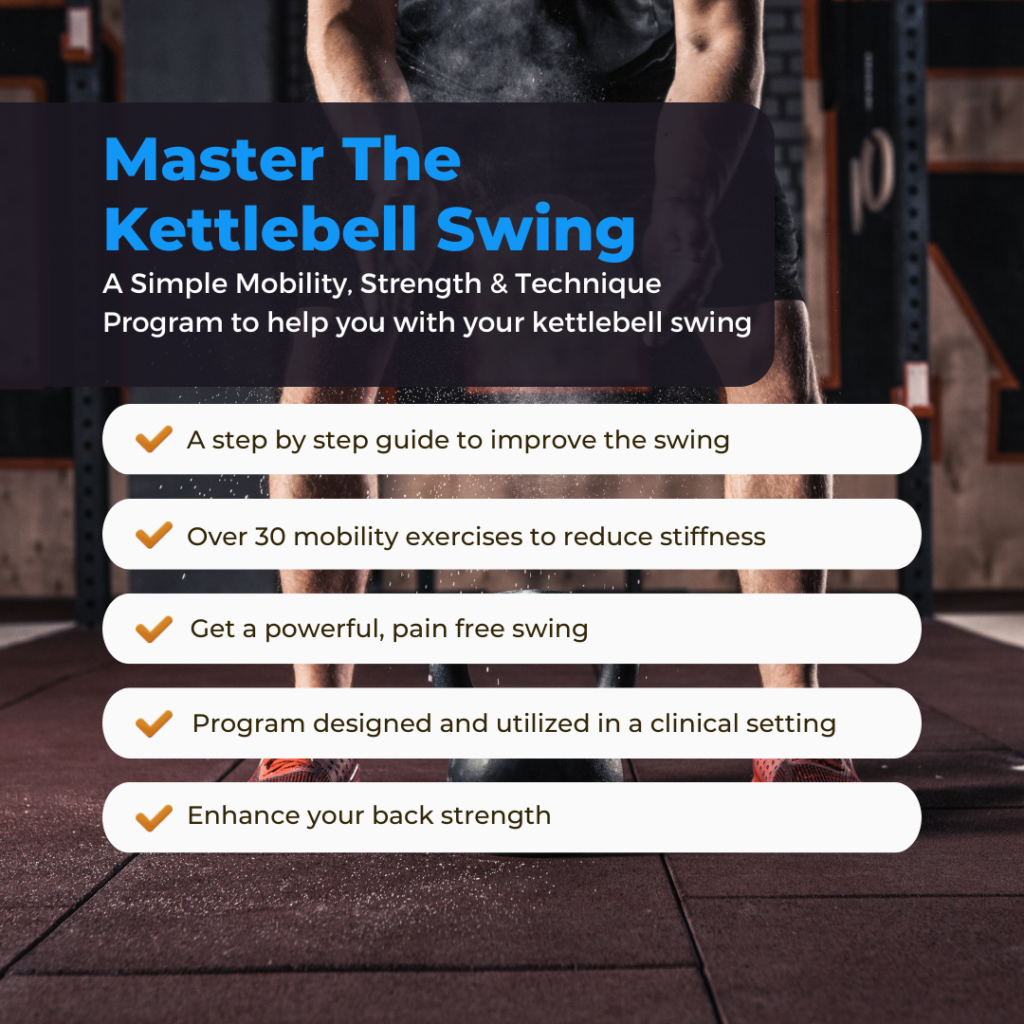
Finally, If you are looking for a proven way to improve your mobility, develop a strong and powerful kettlebell swing all without back pain check out our Master The Kettlebell Swing, Mobility & Technique Program!
Create the perfect kettlebell swing WITHOUT back pain! This easy to follow program includes over 30 mobility exercises, strength exercises and technique videos to help with your swing. Join more than 150 people have used and benefited from this program!
STEP 1: SELF MOBILITY ASSSESMENT
If you don’t have pain but lack the mobility to perform any of the tests, you will need to do some form of mobility or stability work to gain the required mobility, HOWEVER, dont avoid starting the swing as this will help you gain the specific mobility required. This may be as simple as doing some warm up work to loosen up just prior to swinging or it may involve peeling right back to basics to finding the deeper underlying cause of your lack of mobility.
Below are 3 simple mobility tests to try before you next pick up a bell and swing it. For each test, ask yourself 2 questions;
- Is there pain/excessive tightness (a small amount of tightness is ok)
- Do I pass the minimum required mobility demands of the test? (outlined below)
1. Flexion Pattern
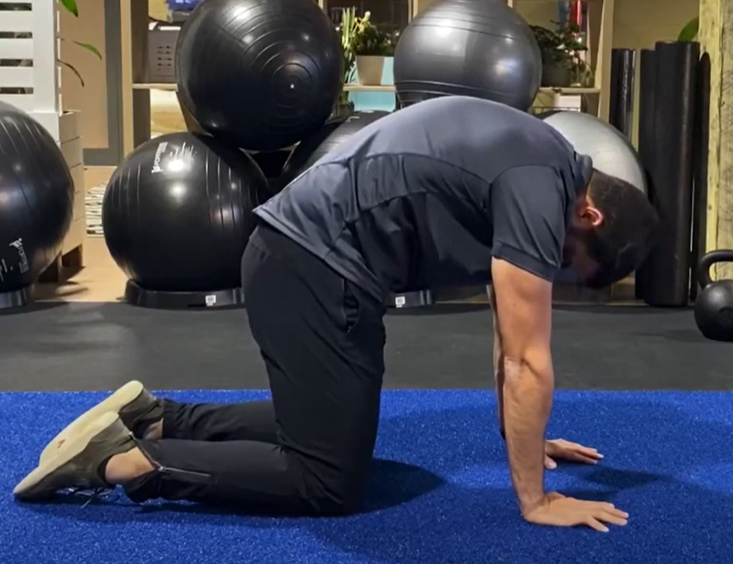
Aim: To assess for pain and for limitations of the posterior chain (Calf, Hamstring, Glutes, Back muscles)
- Simply start on hands and knees with hands under shoulders and knees under hips. Flex your spine, including tucking your chin to your chest.
- Does this hurt? Y/N
2. Extension pattern
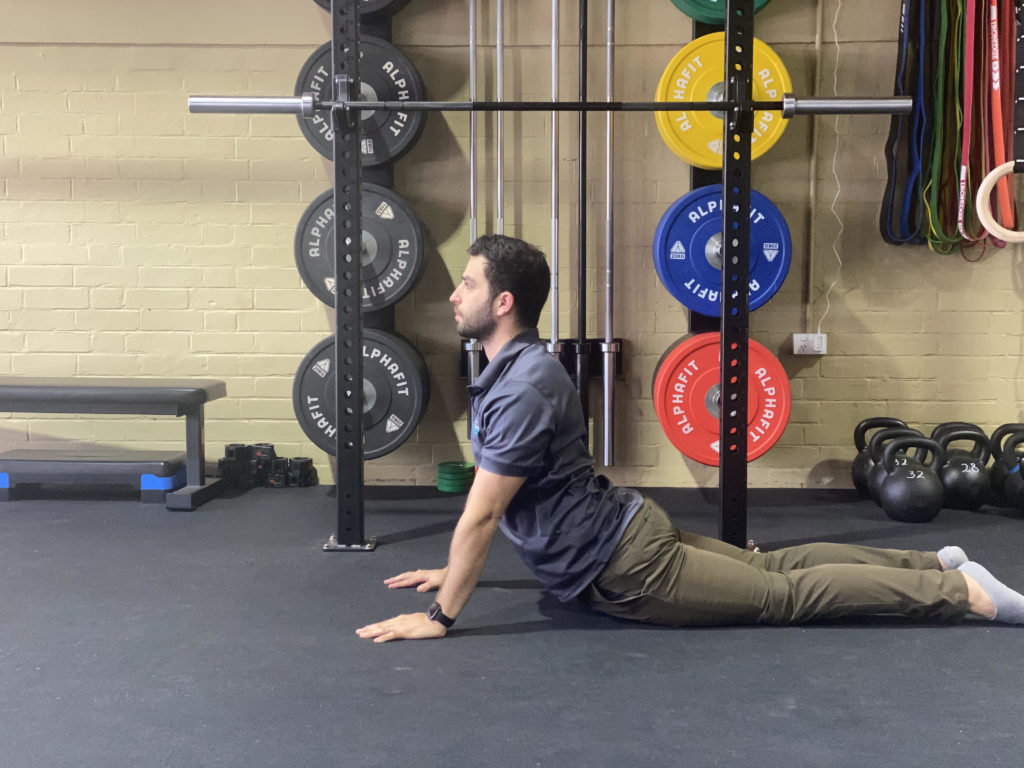
Aim: To assess for pain and anterior chain tension (quads/abs)
- Lay on your stomach with hands undershoulders. Straighten your arms to full extension.
- Does it Hurt? Y/N
3. Hip extension (Thomas test)
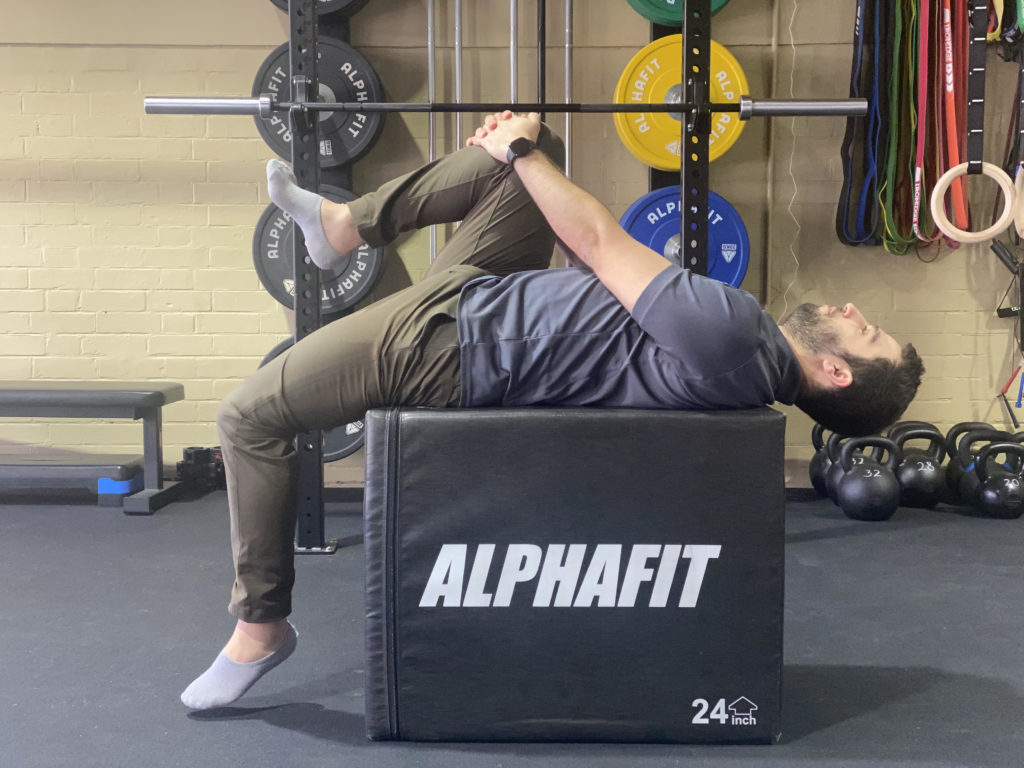
Aim: To assess hip extension.
- Lay on the edge of table/bench/bed with one leg hanging off the edge and one leg squeezed to your chest.
- Does it hurt? Y/N
- Does your knee drop below your hip? Does your knee bend to around 90 degrees? Y/N
STEP 2: IMPROVE YOUR SWING (in 8 simple steps)
Follow this step by step video guide to build a stronger, more powerful and painfree kettlebell swing.
Step 1: Dowel Assisted Hip Hinge
Step 2: Unassisted Hip Hinge
Step 3: Kettlebell Deadlift
Step 4: Power Kettlebell Deadlift
Step 5: Kettlebell Hike
Step 6: Kettlebell Swing
Step 7: Kettlebell Swings
Step 8: Breathwork & Bracing
Want to get rid of your back pain when doing the Kettlebell Swing? Download our Master The Kettlebell Mobility & Technique Program Below!